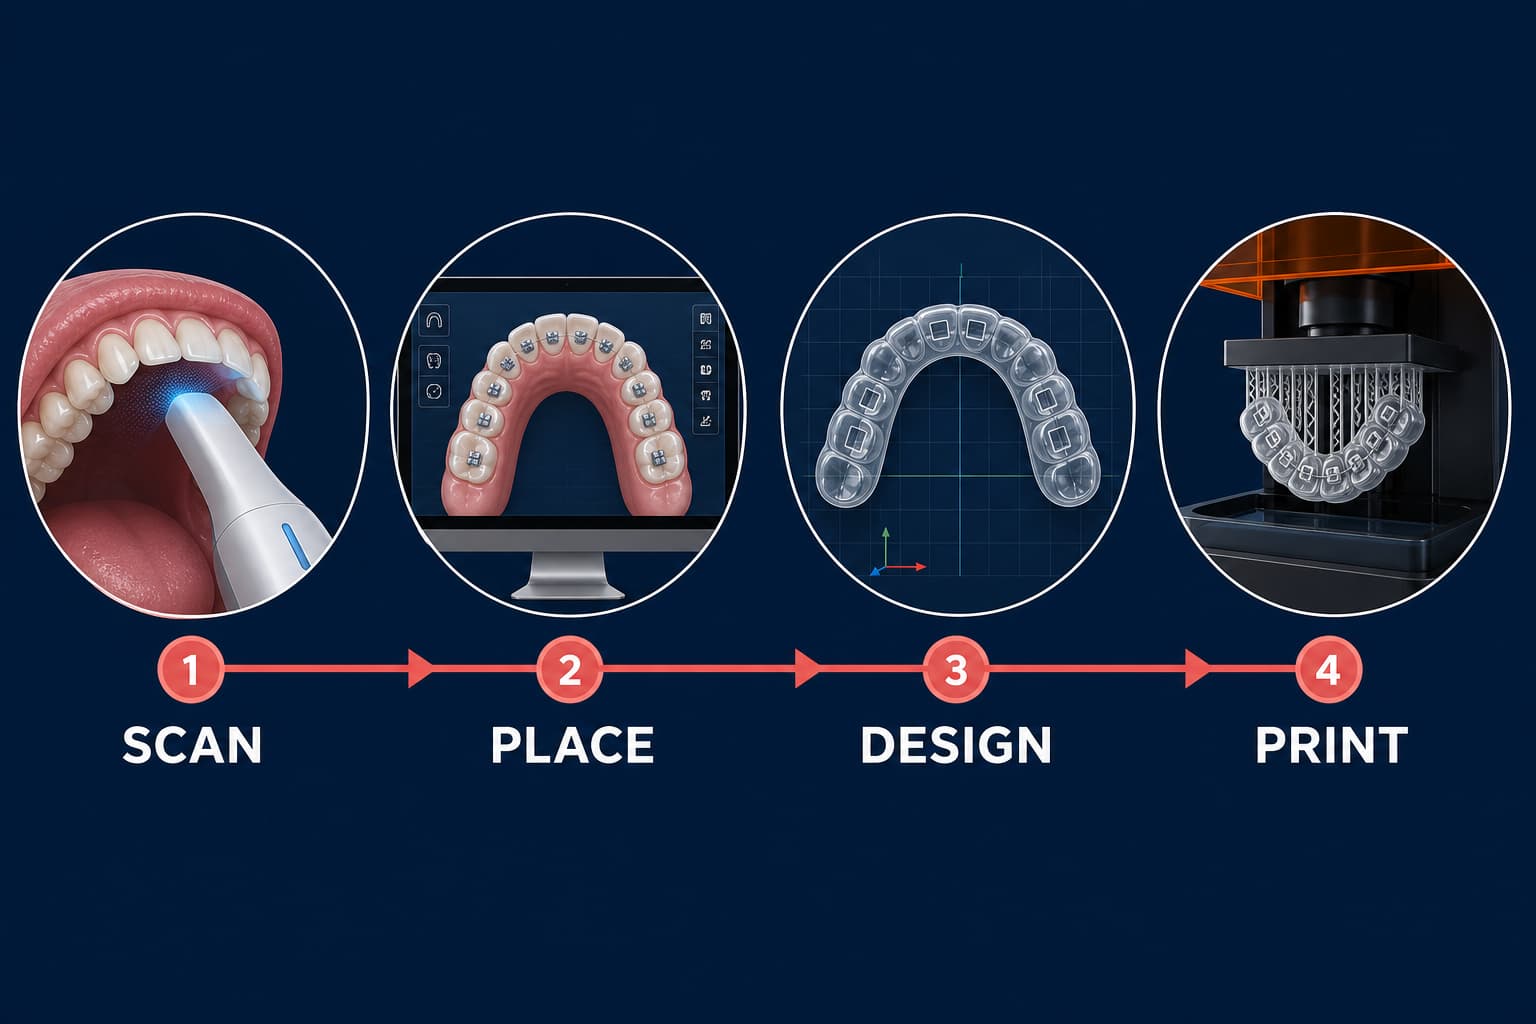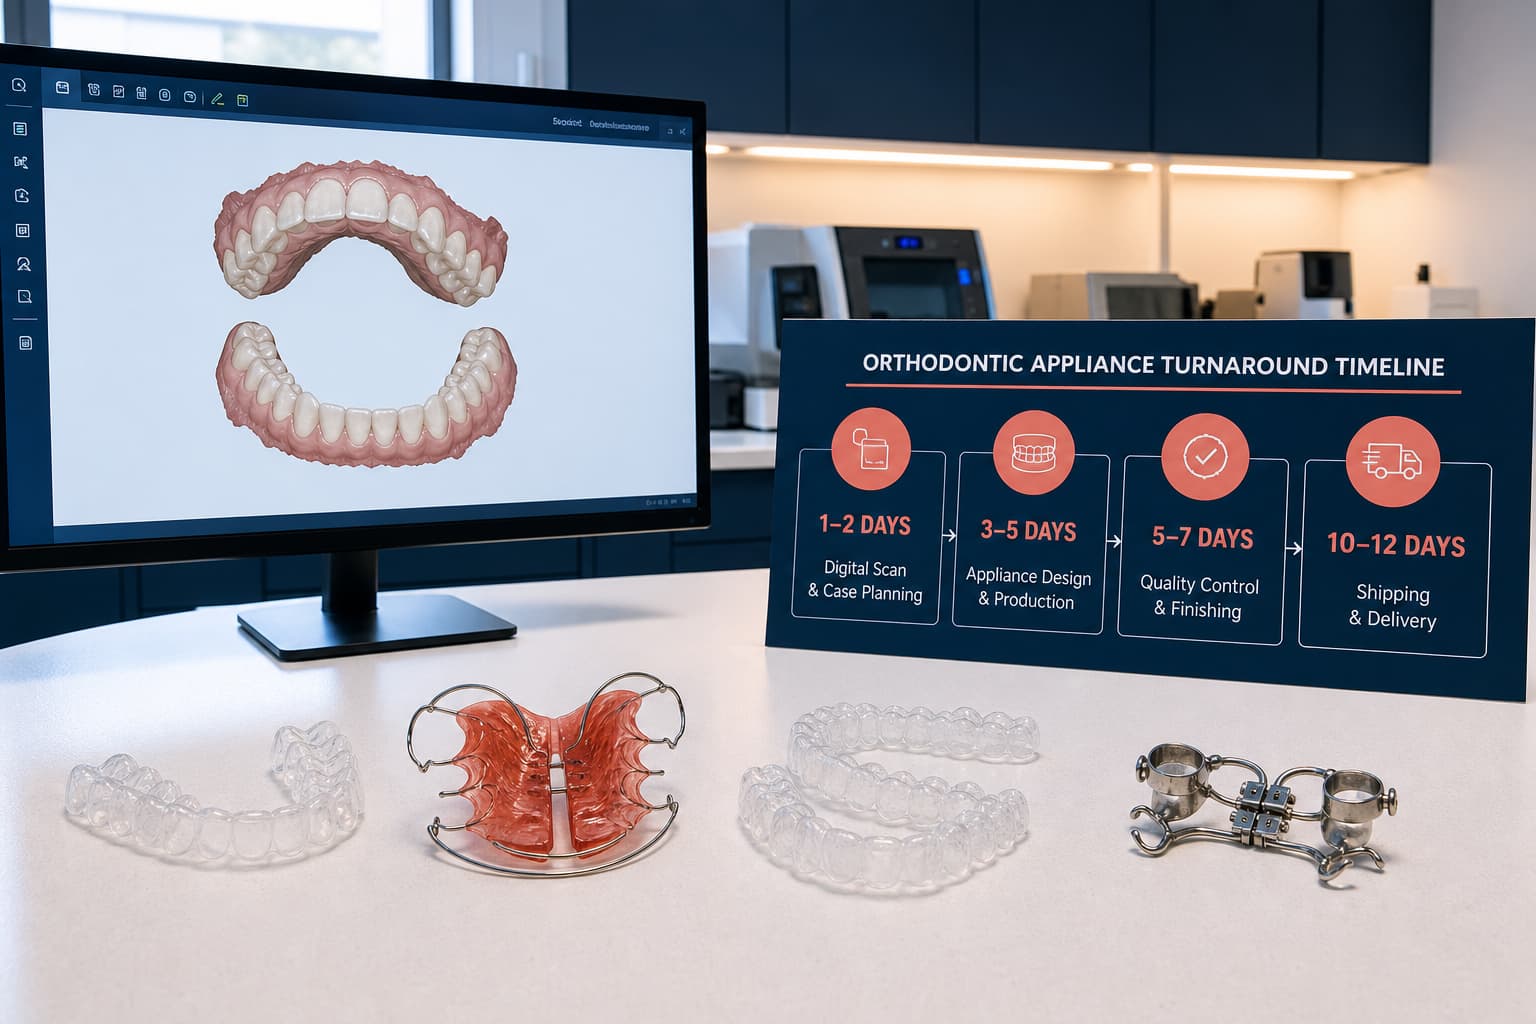
3D-printed surgical guides convert temporary anchorage device (TAD) placement into a predictable, sub-millimeter clinical routine. By merging volumetric bone data from cone-beam computed tomography (CBCT) with high-fidelity surface scans, you eliminate positional ambiguity surrounding root proximity, cortical thickness, and sinus boundaries. Achieving this accuracy requires a validated digital chain: calibrated image fusion, precise sleeve engineering, controlled additive manufacturing, and thorough post-processing.
Data Fusion: Merging CBCT and Intraoral Scans
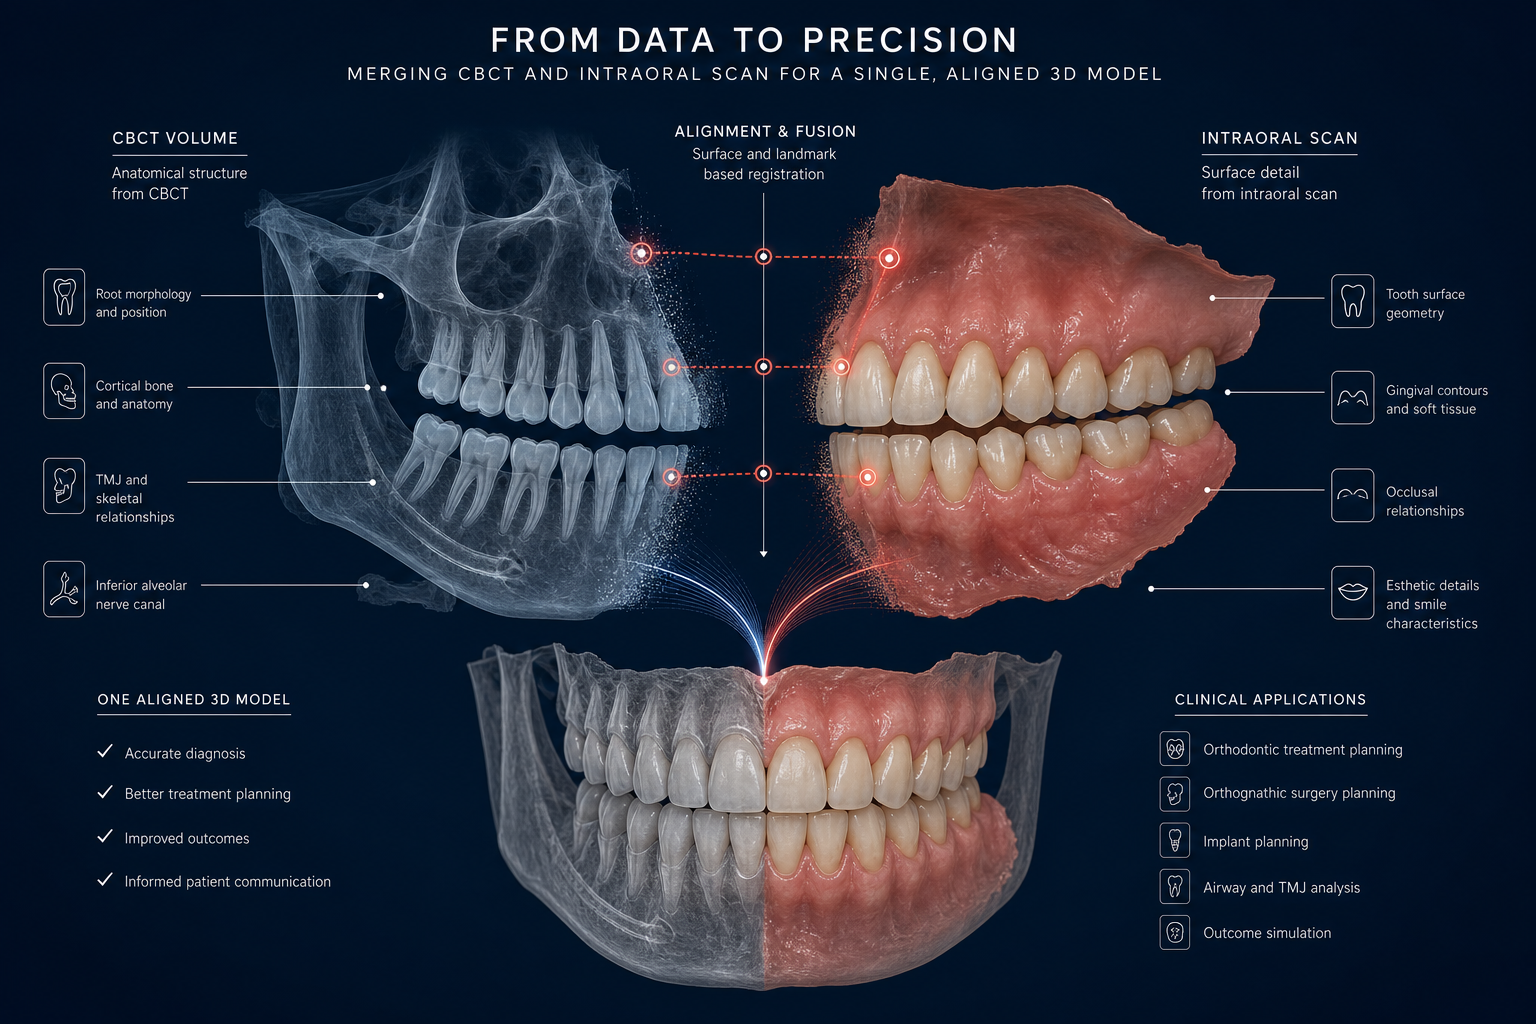
A predictable guided workflow depends on high-fidelity input data. Intraoral optical scanners capture dental surface geometry, crown morphology, and soft tissue contours with high trueness. However, optical surface scans cannot visualize root convergence, interradicular bone volume, or hidden anatomical boundaries.
Visualizing deep hard tissue requires CBCT imaging. Professional radiological guidelines emphasize that CBCT acquisition must be justified on an individual basis rather than used as a routine diagnostic screen. To keep patient radiation doses as low as reasonably achievable, you should employ task-specific fields of view (FOV) and low-dose exposure protocols targeted specifically at the intended insertion site.
In specialized orthodontic CAD software, the laboratory merges the CBCT DICOM file (representing skeletal architecture and roots) with the intraoral STL file (representing clinical crowns and soft tissue). Superimposing these datasets overlays accurate surface details onto the radiographic volume, establishing a complete digital patient model for virtual trajectory planning.
CAD Phase: Engineering Trajectories and Guide Tolerances
With the merged dataset established, the CAD technician aligns the optimal TAD insertion path relative to your clinical prescription. The software evaluates available interradicular space or palatal cortical thickness, matching planned force vectors to your biomechanical objectives.
When designing the physical guide template, three primary parameters govern clinical precision:
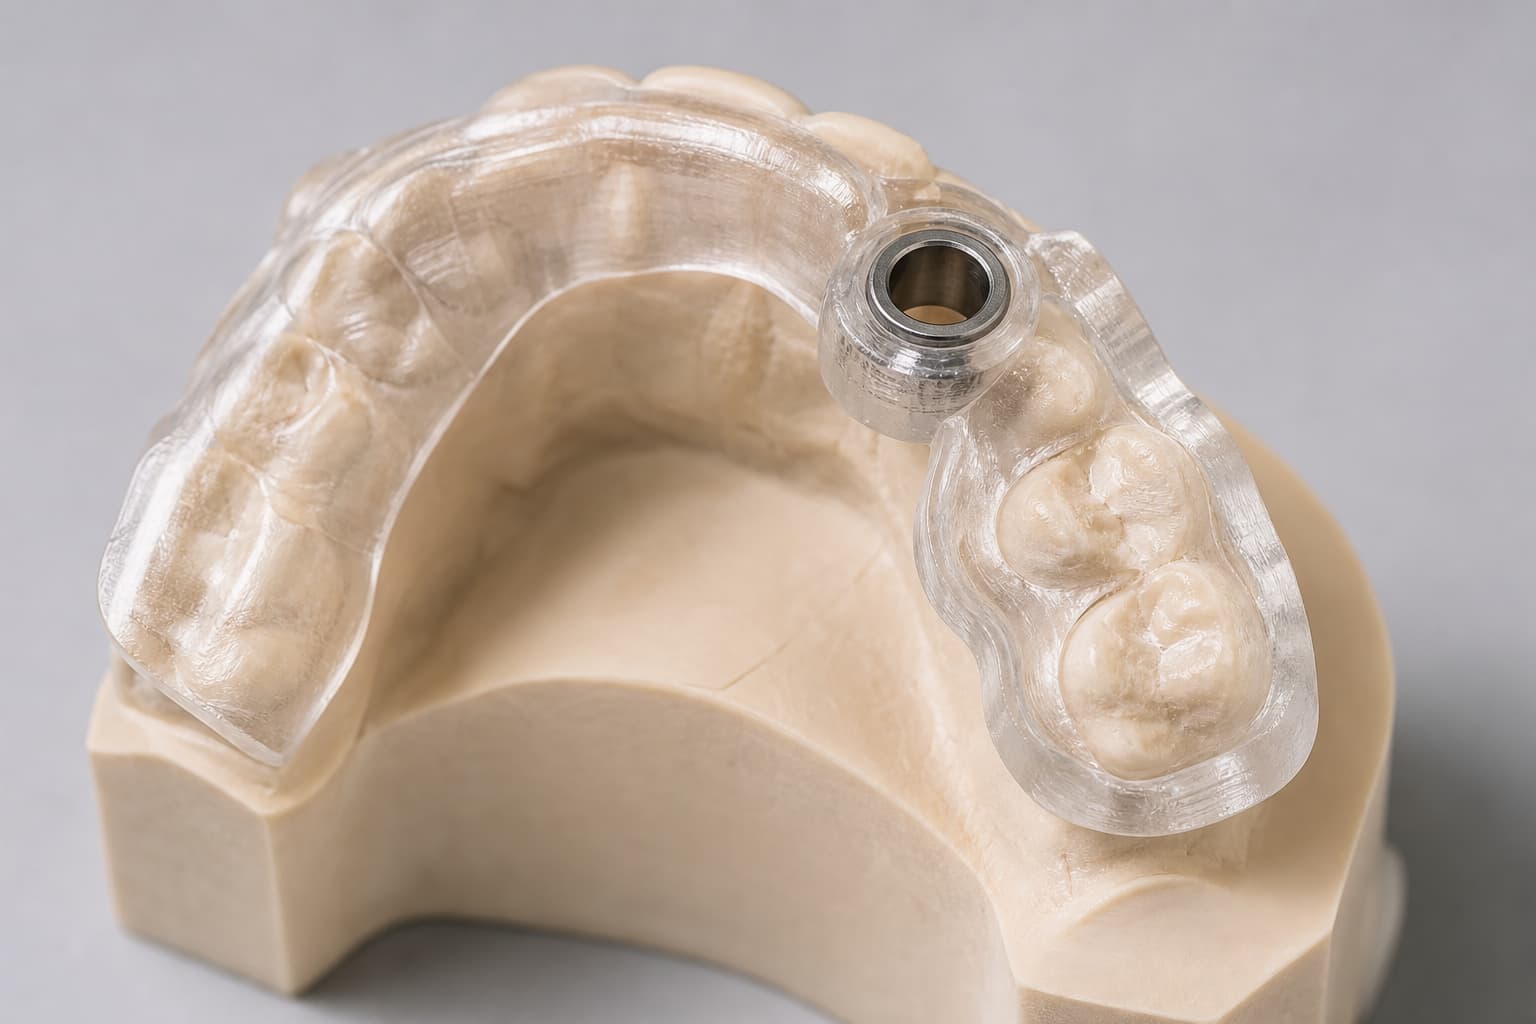
- Guide Sleeve Length: Sleeve height directly dictates insertion stability. Extending sleeve height from 3.0 mm to 6.0 mm substantially reduces tip deviation by constraining driver tilt during pre-drilling and miniscrew insertion.
- Internal Sleeve Clearance: Spatial tolerance between insertion instruments and the internal guide wall must maintain a delicate balance. Loose clearance introduces angular error, while excessive friction generates unwanted resin wear debris.
- Support Base and Inspection Windows: The template requires rigid, non-yielding seating across adjacent occlusal surfaces to prevent intraoperative tipping. Integrating visual inspection windows into the CAD design allows you to confirm full passive seating chairside before engaging the screw.
CAM Phase: Resins, Printer Accuracy, and Post-Processing
Once designed, the guide file moves to physical production. Modern 3D printing in orthodontics relies on Stereolithography (SLA) and Digital Light Processing (DLP) technologies. These light-curing systems build templates layer-by-layer at resolutions down to 25–50 microns, maintaining strict adherence to orthodontic 3D printer accuracy standards.
Surgical templates demand certified Class IIa biocompatible photopolymers formulated specifically for short-term intraoral use. As covered in our overview of orthodontic 3D printing materials, these resins offer high flexural strength and dimensional stability to resist deformation under seating pressure.
A freshly printed guide contains unreacted, mobile monomers. To make the device biologically safe and mechanically resilient, it must undergo a validated 3D printing post-processing for orthodontics sequence:
- Solvent Washing: Multi-stage baths in isopropyl alcohol flush uncured resin from narrow internal sleeves without dissolving the cured structural polymer matrix.
- Secondary UV Curing: Controlled ultraviolet exposure completes resin cross-linking, elevating mechanical strength and eliminating residual monomers.
Sterilization protocols also warrant careful control. High-temperature steam autoclaving can trigger thermal distortion or linear shrinkage in certain printed polymers. Selecting thermally stable resins or applying validated cold chemical disinfection protocols ensures your guide retains its dimensional fidelity prior to insertion.
Clinical Application and Accuracy Considerations
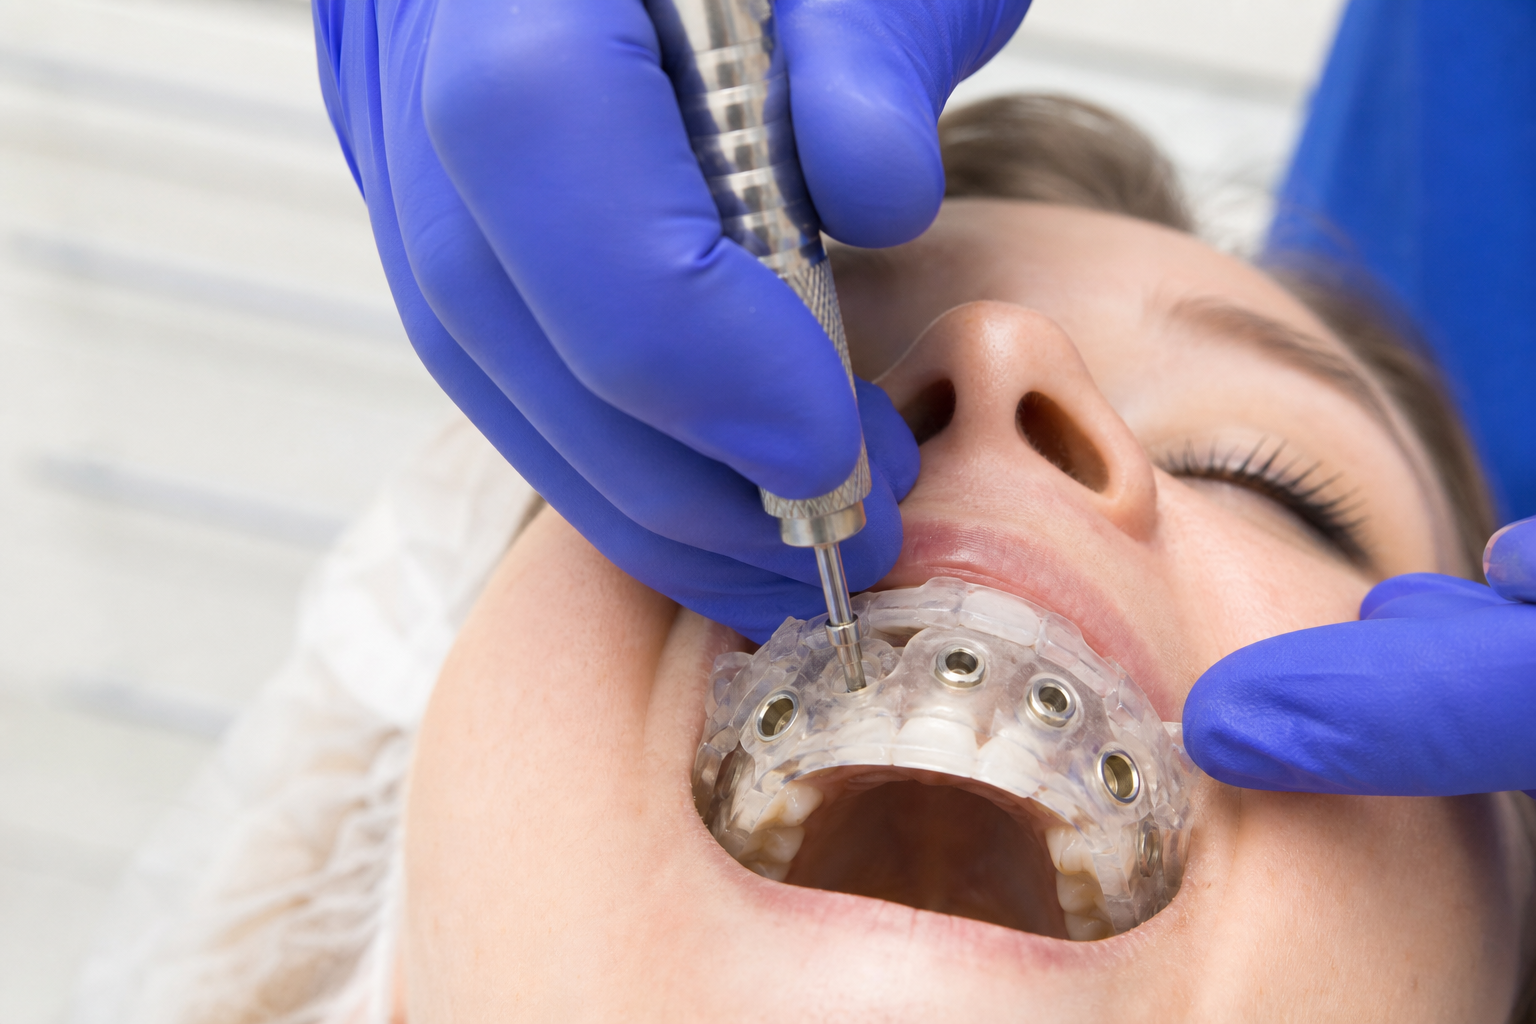
During clinical delivery, seat the surgical guide over the arches, verify complete passive adaptation through the inspection windows, apply firm digital pressure, and advance the miniscrew through the guide sleeve along the planned trajectory.
Balancing Precision Against Clinical Workflows
Guided insertion achieves significantly higher linear and angular placement accuracy than freehand techniques, drastically reducing root contacts and periodontal ligament perforations. Nevertheless, implementing guided protocols requires evaluating clear operational trade-offs:
- Retention Rates: Clinical trials show that superior placement precision does not automatically guarantee lower short-term TAD failure rates. Miniscrew stability remains multifactorial, depending on bone density, patient hygiene, cortical thickness, and immediate mechanical loading.
- Cumulative Error: Guided workflows involve multiple steps. Minor errors can accumulate across image acquisition, dataset registration, print shrinkage, sleeve tolerances, and intraoperative guide seating.
- Workflow Overhead: Data fusion, software design, and custom printing add production time and material cost compared to direct freehand insertion.
Guided protocols provide their highest clinical value in high-risk anatomical zones – such as narrow interradicular spaces, dense palatal vaults, or anchor sites for bone-borne expanders – where positional tolerances are narrowest.
Streamlining Your Guided Workflow with Nordicdens
Managing DICOM-STL registration, printer calibration, post-curing verification, and mechanical sleeve clearance in-house requires substantial laboratory equipment and technician time. Partnering with a specialized laboratory eliminates these operational hurdles, enabling your practice to deliver precise anchorage solutions efficiently.
At Nordicdens, we combine orthodontic expertise with industrial-grade additive manufacturing. Utilizing advanced CAD/CAM orthodontics, we convert your intraoral scans and radiographic data into precise, biocompatible surgical guides delivered directly to your clinic.
Establishing a streamlined digital workflow from intraoral scan to appliance eliminates chairside guesswork and enhances surgical execution. Contact the Nordicdens laboratory team today to review surgical guide specifications or submit your next digital case.