Three methods trim thermoformed aligners: hand cutting with scissors and rotary tools, CNC or robotic milling, and CO₂ laser cutting. The method matters less than a decision made before it: where the trimline sits. In published bench tests, that single choice changes aligner retention far more than the tool that cuts it.
Use this table to scan your options, then read on for the reasoning.
| Method | Best suited to | Edge after cutting | Main trade-off |
|---|---|---|---|
| Scissors and rotary tools | Low volume, retainers, one-off adjustments | Needs finishing and polishing | Operator-dependent, slow, hard on the hands |
| CNC or robot milling | Labs with a digital model workflow | Smooth path, still check the edge | Research and specialist equipment, limited independent data |
| CO₂ laser cutter | Series production, scalloped lines | Manufacturers state no polishing is needed | Cost, and the claims come mostly from vendors |
Choose the trimline before the trimming method
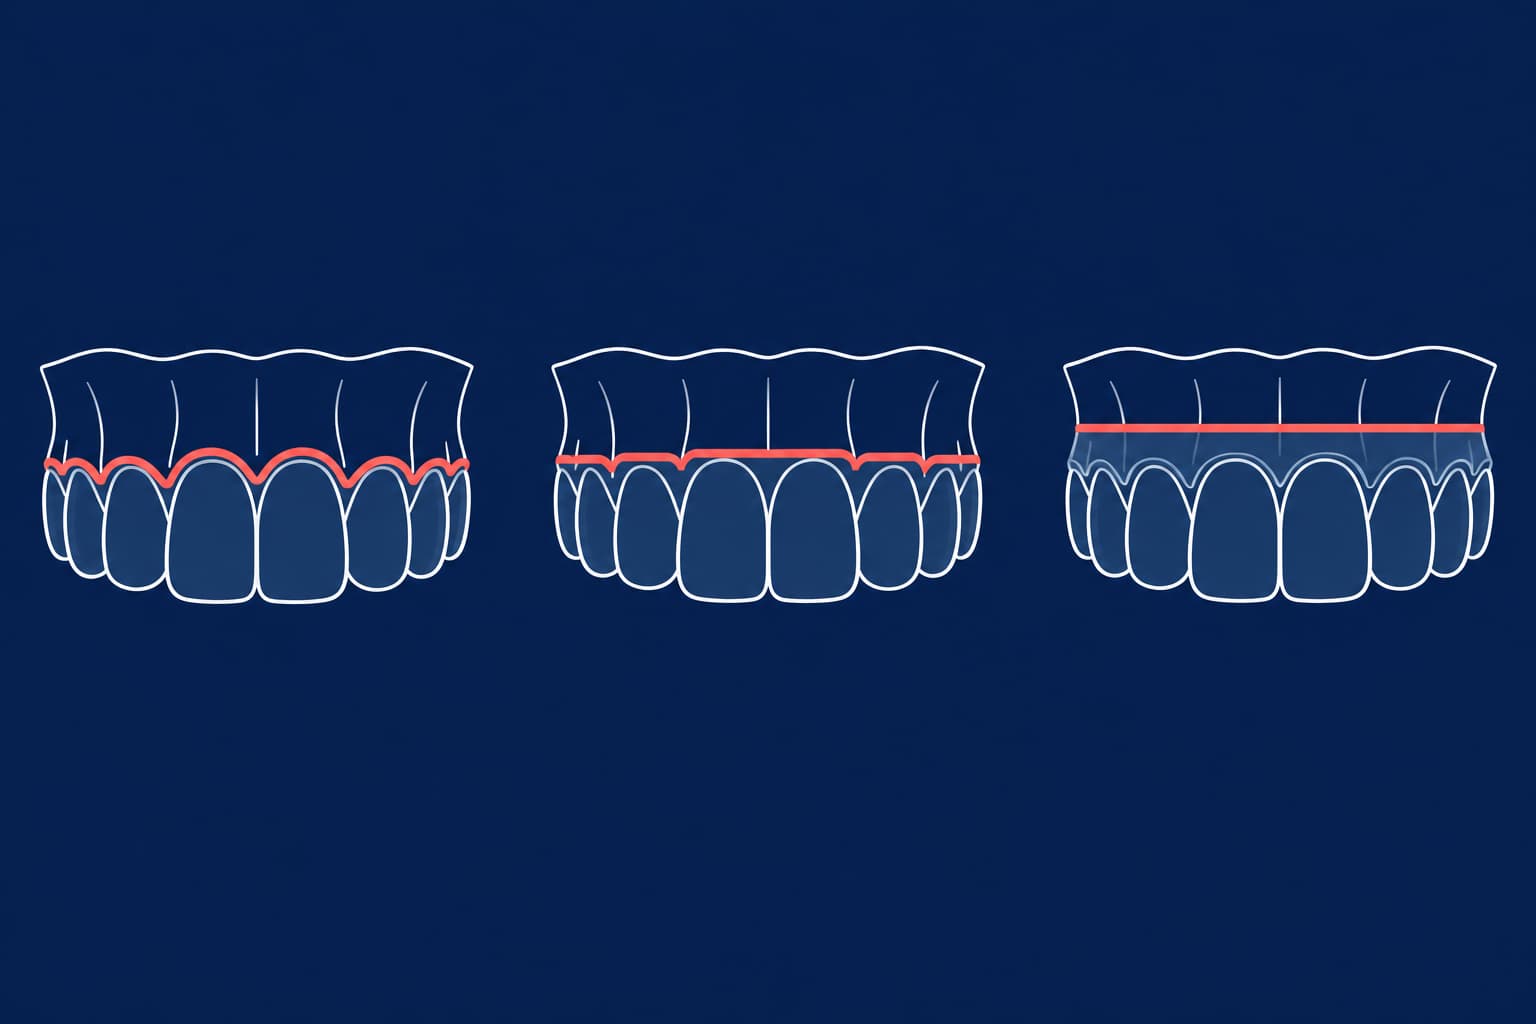
A trimline is the aligner's gingival border. Three designs appear in the literature: scalloped (following the gum contour), straight at the gingival zenith, and straight 2 mm above the zenith, which means the edge rests about 2 mm onto the gingiva.
The reference experiment is Cowley, Mah and O'Toole (Journal of Clinical Orthodontics, 2012), which pulled aligners off models with each margin. The straight margin 2 mm above the zenith held best. Zendura Dental's summary of that work reports it as roughly twice as retentive as a scalloped cut without attachments, and over four times as retentive with attachments.
A 2026 in vitro study shows how large the spread can be. It tested 72 aligners, thermoformed ones from 0.89 mm Zendura VIVA sheet among them. The highest mean retention was 26.18 N (Straight 2 mm, thermoformed, with attachments). The lowest was 3.25 N (Scalloped 0 mm, thermoformed, no attachments). A 2024 systematic review of 12 studies agrees on the direction: straight and extended margins generally delivered higher forces and moments, especially for intrusion, translation, tipping and root torque.
Read these results with three caveats:
- They are bench and finite-element results. A scoping review notes that the ranking of the three designs comes from a single laboratory study and has not been validated in prospective clinical trials.
- Scalloped lines have a reason to exist. They follow the gingival margin and hide the aligner edge, and they sit away from the soft tissue. A scoping review on marginal edge design found only three studies on the topic and concluded that current findings do not allow a definitive recommendation for periodontal health.
- A scalloped cut is also a finishing problem. One review notes the trim requires polishing, which can weaken the material and increase flexibility in the gingival area.
Decision rule: if the case needs predictable grip, such as intrusion, torque or few attachments, specify a straight cut at or above the zenith. If aesthetics or gingival comfort dominate, or the patient has recession, a scalloped or short straight line is reasonable, and you plan for attachments. Whatever you choose, write it on the lab prescription so the trimmer does not improvise.
Manual trimming: scissors, scalpel and rotary tools
Manual trimming is where most labs and in-office setups start. It needs no capital outlay, but the result depends on the technician.
- Let the formed sheet cool fully on the model. One in-office guide puts cooling at 30 to 60 seconds and warns that removing it early causes warping.
- Rough-cut the excess sheet around the model with curved crown scissors or specialised sheet scissors, staying close to the intended margin. Formlabs also lists cutting discs and carbide triangular cutters as suitable.
- Refine the line on the model with a scalpel, scissors or a rotary tool, then lift the aligner off without flexing it.
- Finish the edge (see below).
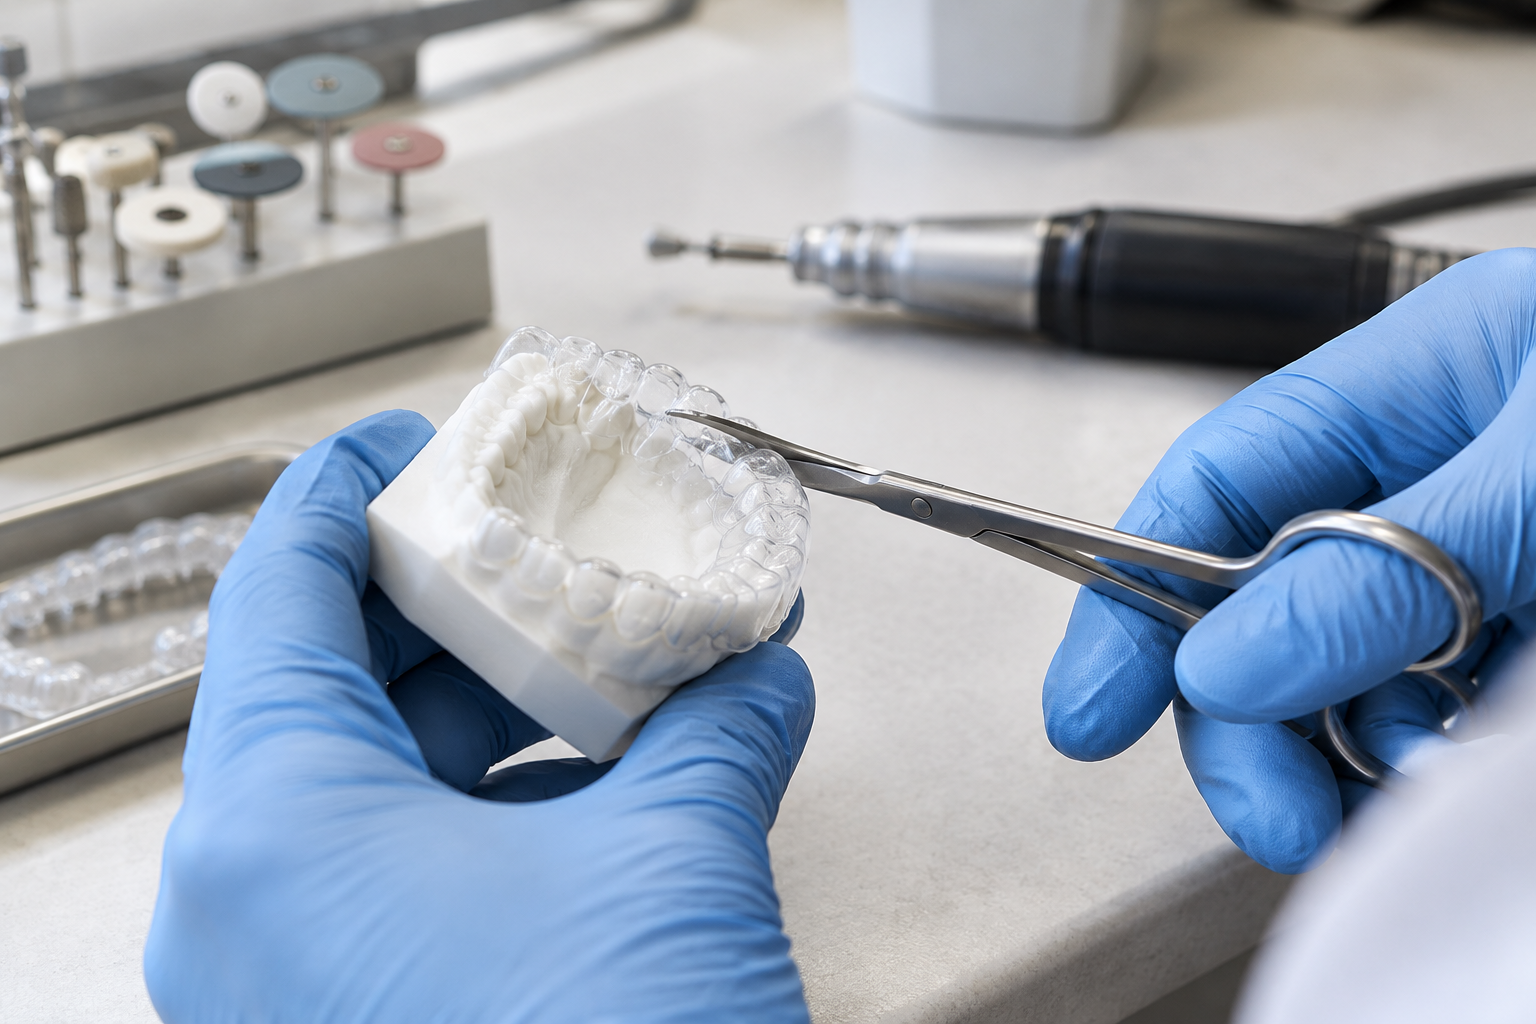
Tool choice follows the cut you want. The 3Shape Clear Aligner Studio handbook calls scissors by far the quickest option, but notes they strain the hands and the aligner and limit detail; for a scalloped cut, a rotary tool is the only option. Plan accordingly: a straight cut suits scissors, a scalloped cut means a handpiece and a steadier workflow.
A common mistake is cutting past the model's margin line because the sheet is rigid and "easier" to cut straight. That moves your trimline, and with it the retention you specified. Cut on the model, not freehand off it.
Laser trimming
CO₂ laser cutters (typically a 10.6 µm beam) automate the cut from a digital trimline. Thermoplastics such as PET and polyurethane absorb this wavelength strongly, according to laser supplier Luxinar, which is why they cut cleanly.
The workflow runs on digital files. You import the STL model into trimline software, which generates or loads the line, lets you adjust it and exports it. Thermoformed aligners often stick tightly to the printed model, so some systems add separator bars or a mounting plate to the model to make removal after cutting safe. For model preparation, see our guide to STL files in orthodontics.
Vendor figures give a sense of throughput. Axera Dental describes a 20 W Class 1 CO₂ laser cutting one aligner in about one minute. ORTHOiN3D claims under 15 seconds for its iNLASE machine. Both state that polishing is not needed. Treat those as manufacturer claims: our research found no independent study that compares laser, scissors and CNC edges head to head.
On biological safety, an in vitro study of PETG processed by CNC milling and CO₂ laser cutting found only modest, non-significant gene expression changes (COX-2 up 1.8-fold after laser processing). That supports the process in principle, but it does not replace your own check of every edge.
If your process is PETG, power and speed settings matter. A study of CO₂ cutting on 3D-printed PETG plates, not aligners, found the heat-affected zone was smallest at lower power and higher speed. Use it as a reason to validate settings on your sheet, not as aligner data.
CNC and robotic milling
CNC and robotic cutting follows a toolpath derived from the model's gingival curve. A 2024 Scientific Reports study on flexible aligner manufacturing reported a maximum registration error of 0.03 mm between the scan and the workpiece. The authors reported average processing of about 20 seconds per robot-processed piece against 120 seconds for manual work, though they do not fully explain what each figure includes.
The practical limit is evidence. That study describes accuracy and smoothness advantages but gives no measured edge-quality comparison against scissors or lasers. For most small labs, CNC is a decision about workflow integration rather than proven edge quality.
Finish and inspect every edge
Cutting is only half the job. A cut edge that is rough or sharp can irritate soft tissue, and a 2026 meta-analysis discussion links surface irregularities to plaque accumulation, tissue irritation and perceived aesthetics.
- Grind and smooth. One retrospective cohort workflow trimmed along the gingival margin with a rotary cutting tool, then used a polishing disc (Lisko-B, Erkodent). Erkodent's own thermoforming guide pairs a tungsten carbide bur for smoothing with Liskosil instruments for prepolishing.
- Polish gently. Gt Flex instructs a slow-speed handpiece, felt cone and fine pumice for sheet edges. Keep the sheet's protective lamination on during finishing where the manufacturer supplies it.
- Skip flame polishing unless the manufacturer allows it. It is used on some acrylics and polycarbonates, but we found no support for it on aligner sheet.
- Run a fingertip check. Drag a fingertip along the margin; any catch means it goes back to the bench.
If your edges look cloudy, torn or warped after trimming, the cause may sit upstream in forming. See our guide to thermoforming defects. Sheet type matters as well: PETG and polypropylene and multilayer materials behave differently under the cutter.
Retainers need a different margin logic
Do not copy aligner logic to clear retainers. A clinical review in APOS Trends in Orthodontics advises against trimming a retainer back to the cervical line, because that reduces plastic adaptation in retentive undercuts. One published recommendation extends borders 3 to 4 mm onto the facial and lingual gingiva, with notches at the frenums. If the border blanches the tissue, reduce the excess height with curved Mayo scissors.
The evidence here is thinner than for aligners, and no single consensus position exists for retainers. For the clinical comparison, read Hawley vs. clear retainers.
Match the method to your volume
Run the numbers on your own caseload. A 20-stage case with upper and lower arches is 40 aligners. At the 120 seconds per manual piece reported above, that is 80 minutes of hands-on trimming; at 20 seconds, it is about 13 minutes. A vendor-quoted one-minute laser cycle comes to 40 minutes, but the machine runs on its own while you do other work.
- Under steady low volume, or if you mainly make retainers: manual trimming with sheet scissors and a handpiece is enough. Standardise the trimline in writing and train one finisher.
- Series production with a digital model workflow: automate the cut. Pick based on what you can validate on your own sheet, not on brochure claims.
- Scalloped designs at any volume: a rotary tool at minimum; automation makes it repeatable.
For the surrounding process, see clear aligner fabrication, thermoforming in orthodontics and thermoforming machine selection.
The takeaway: specify the trimline first, cut it with the method your volume supports, and treat the edge finish as part of the appliance. If you want a second opinion on which trimline fits your next case, send it to the Nordicdens lab and we will talk it through with you.